1. Installation Requirements
Before we start installing, let's make sure your computer is fully prepared. Think of this as gathering your tools before building something:
- Bootable USB: Your Memora ISO file must be written/flashed onto a USB flash drive.
- Storage Space: At least 30GB of empty space on your computer hard drive.
- Internet: A stable internet connection (WiFi or LAN cable).
- Data Backup: All your important files safely copied to an external drive or cloud (just in case!).
- Architecture: A computer that supports 64-bit systems and UEFI Boot Mode.
The installation process will erase files on the partition you choose. Please ensure your important photos, documents, and files are backed up safely before proceeding!
2. Downloading the Memora ISO File
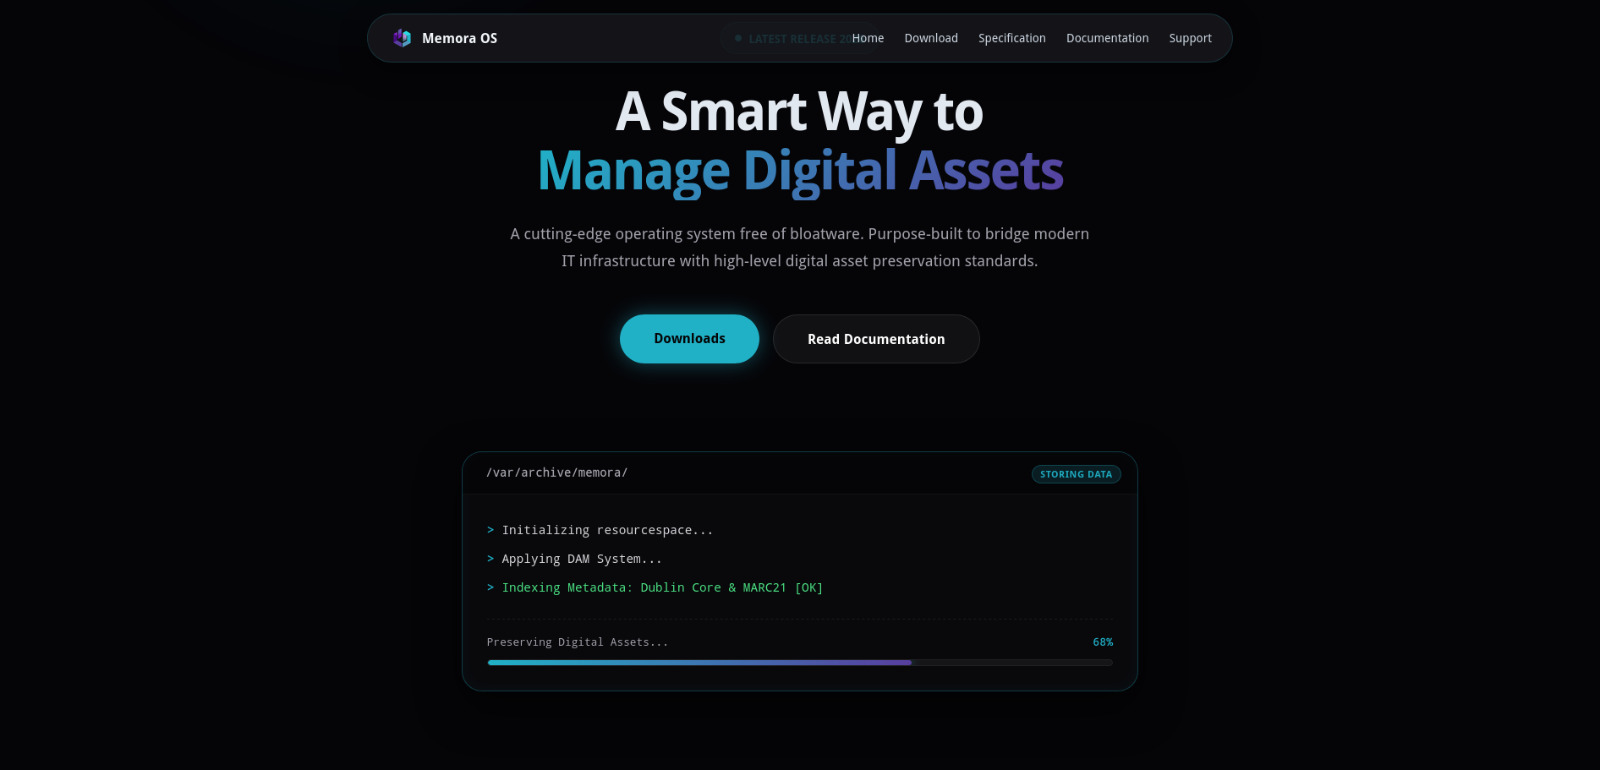
1. Open your web browser and visit the official website on the download page:
2. Click Download to get the Memora ISO file.
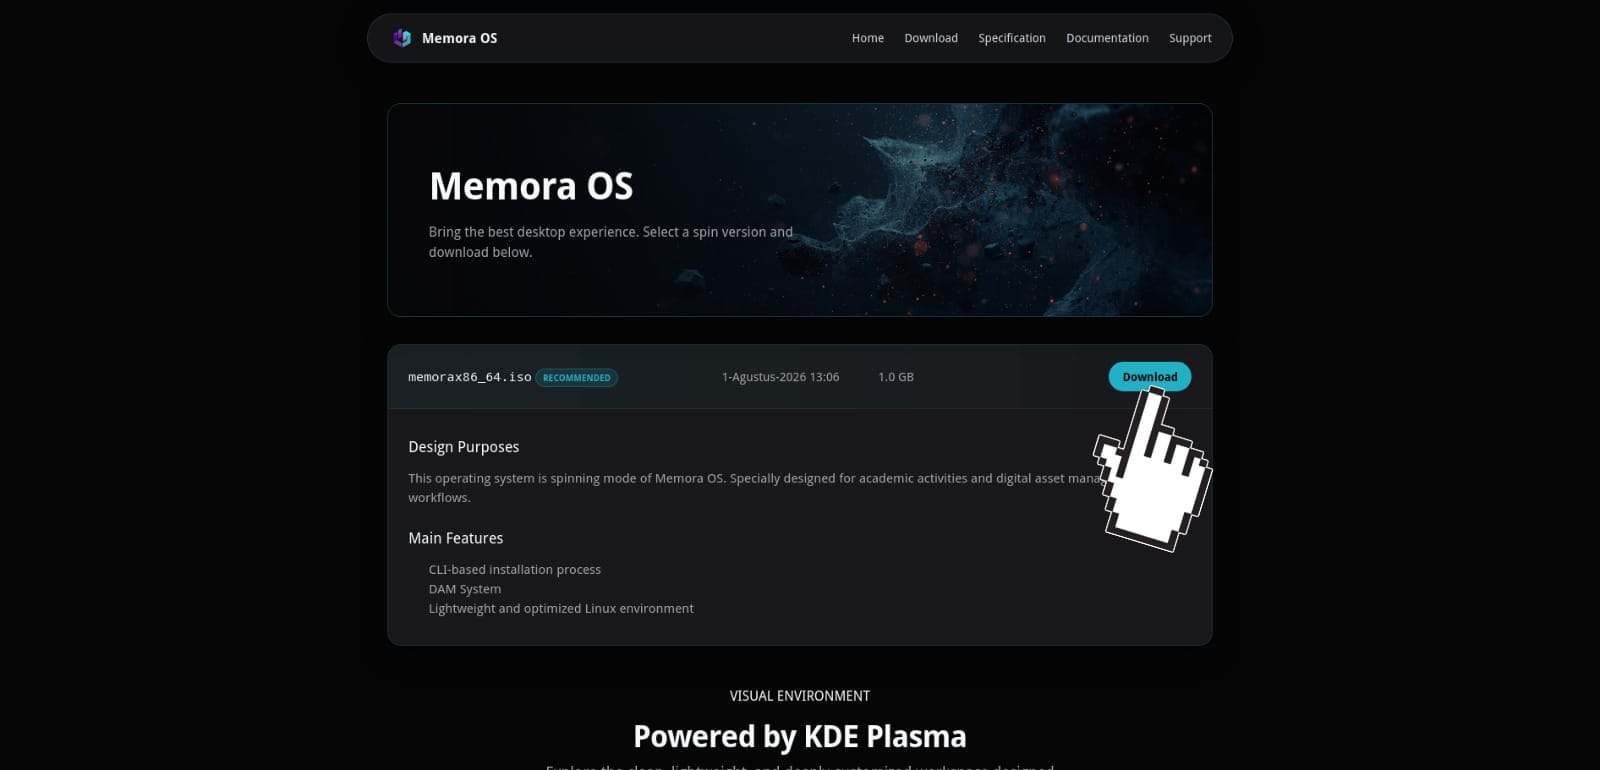
3. Wait until the download process is finished and make sure the ISO file is downloaded perfectly without any interruptions.
3. Downloading and Using Rufus to Create a Bootable Flash Drive
Rufus is a handy tool used to inject or write the Memora ISO file into your flash drive so it can be used as a booting media (a drive that can start up a computer).
3.1 Downloading Rufus
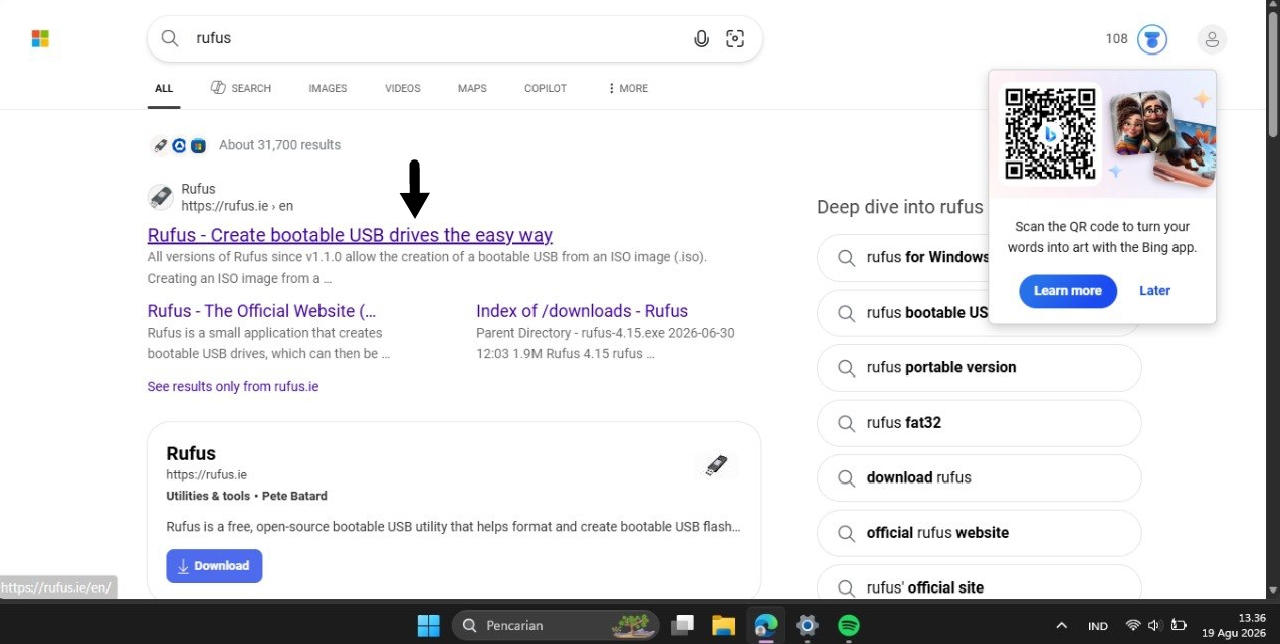
1. Visit the official Rufus website:
2. In the Download section, select the latest version of Rufus (for example, the standard version Rufus X.XX.exe or the Portable version).
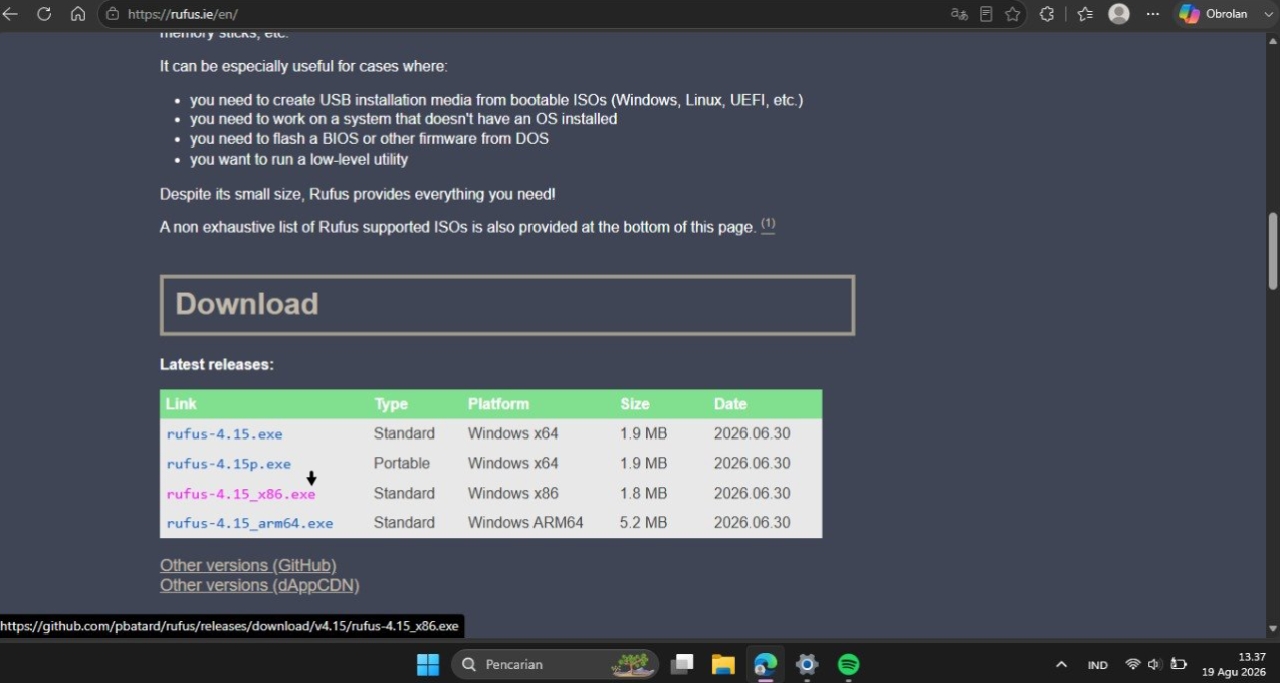
3. Save the Rufus application file to your computer.
3.2 Creating the Bootable Flash Drive
1. Plug your USB flash drive (minimum 2 GB) into your computer's USB port.
All data inside this flash drive will be completely erased. Make sure there are no important files left inside it!
2. Open the Rufus application you just downloaded.
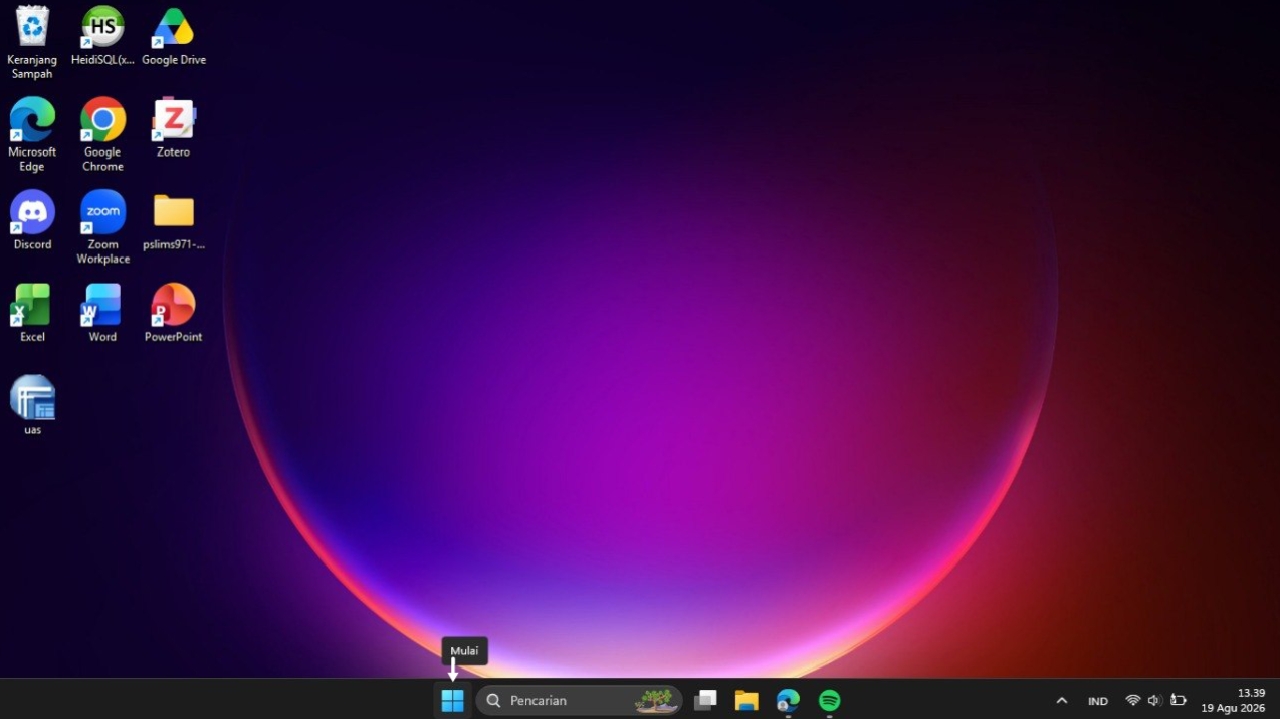
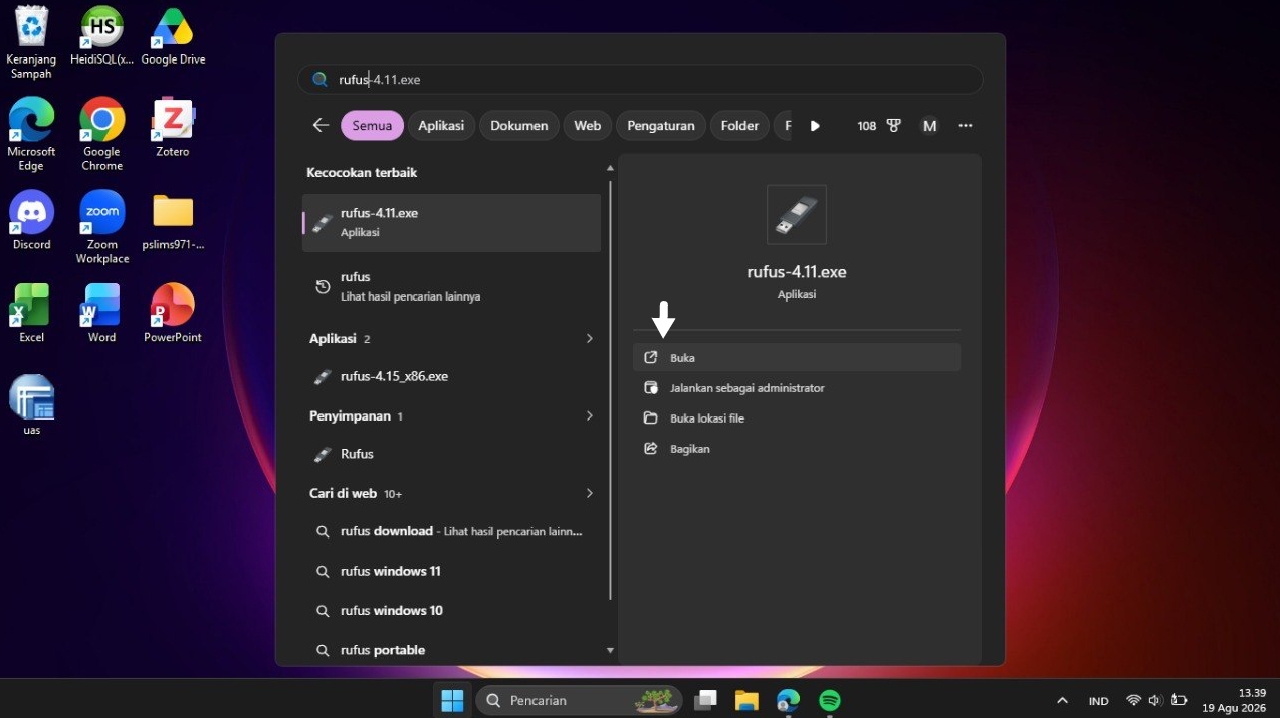
3. Configure the settings in Rufus exactly like this:
- Device: Select your USB flash drive.
- Boot selection: Click the SELECT button, then browse and choose the Memora ISO file you downloaded in Step 2.
- Partition scheme: Select GPT (this is the standard for modern UEFI computer systems).
- Target system: Select UEFI (non CSM).
- File system: Leave this at the default setting (usually FAT32 or Large FAT32).
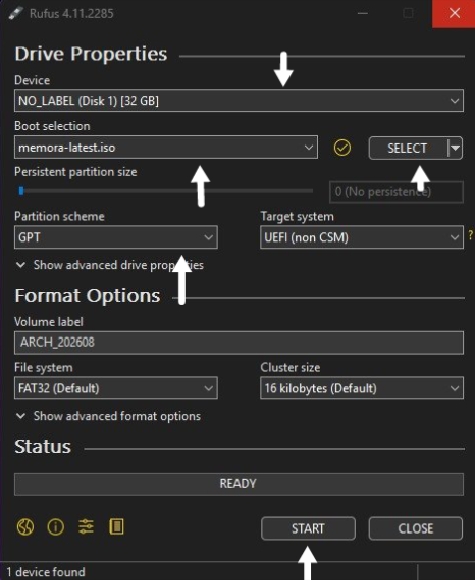
4. Click the START button at the bottom of the Rufus window.
5. If a confirmation pop-up appears saying ISOHybrid image detected, choose the Write in ISO Image mode option (or DD Image mode if it is highly recommended for Memora), and then click OK.
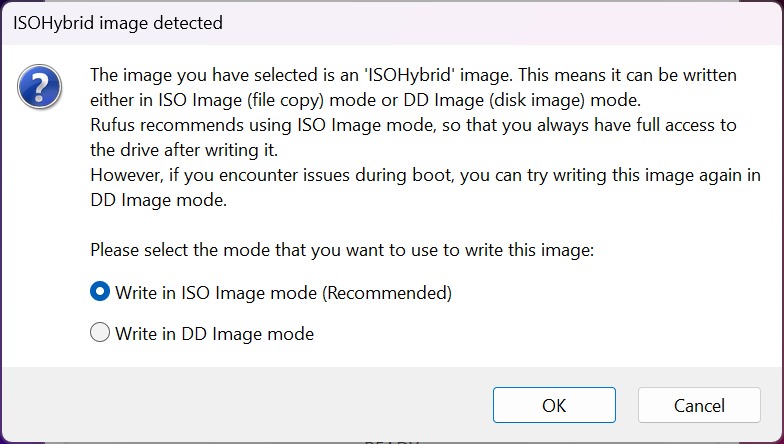
6. Confirm the final warning that all data on your flash drive will be deleted by clicking OK.
7. Wait patiently for the writing process to finish until the green status bar shows READY (100%), then you can safely close the Rufus application.
4. Booting into Memora OS Installer
Make sure you have shrink the volume and prepared the Unallocated Space (as explained in Step 2) before starting this process so you don't accidentally damage existing data partitions.
4.1 Preparation Before Booting
Ensure the following things are met before restarting your computer:
- The Memora bootable flash drive created via Rufus remains connected to a USB port.
- Know your Boot Menu Key based on your computer
4.2 Steps to Enter the Installer
Step 1: BIOS / UEFI Settings (Optional but Recommended)
- Turn off your computer completely.
- Turn on the computer again, then press the BIOS/UEFI Key (usually
F2orDel) repeatedly until you enter the BIOS menu. - Make the following adjustments:
- Secure Boot: Change to Disabled (Arch Linux requires Secure Boot to be turned off to load).
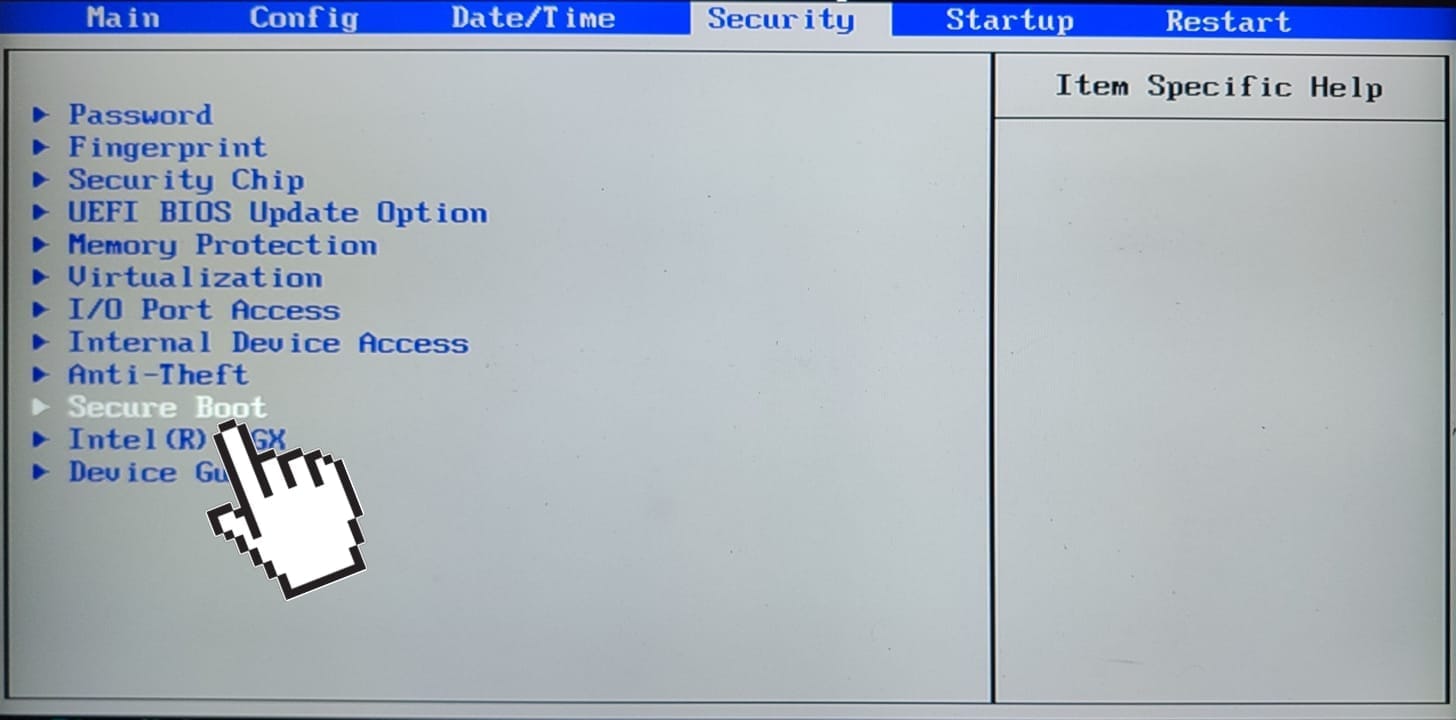
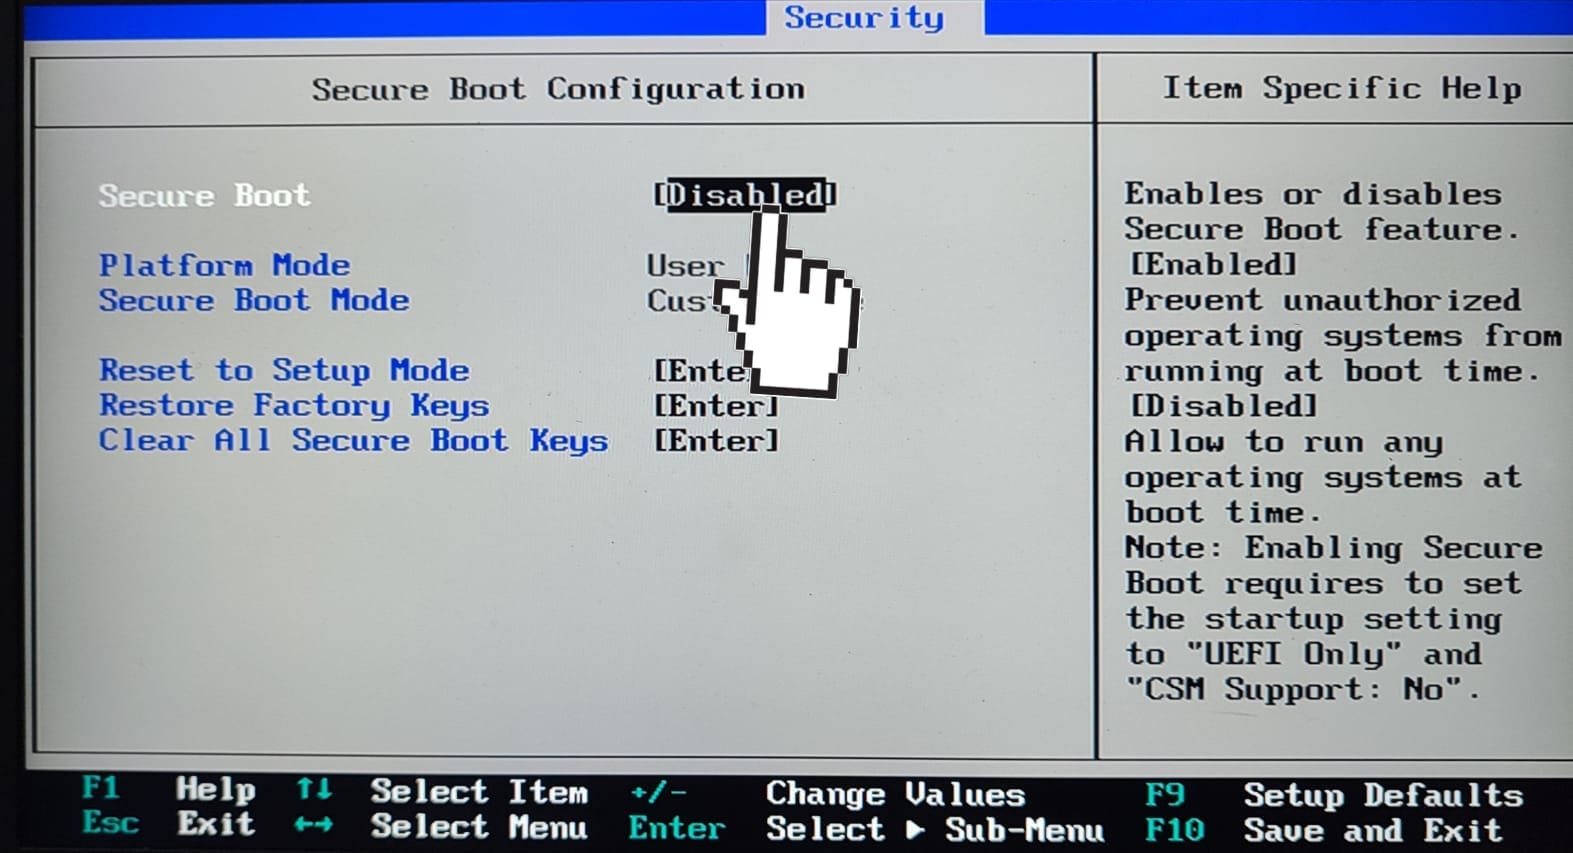
- SATA Mode / NVMe Mode: Make sure it is set to AHCI (not RAID / RST).
- Secure Boot: Change to Disabled (Arch Linux requires Secure Boot to be turned off to load).
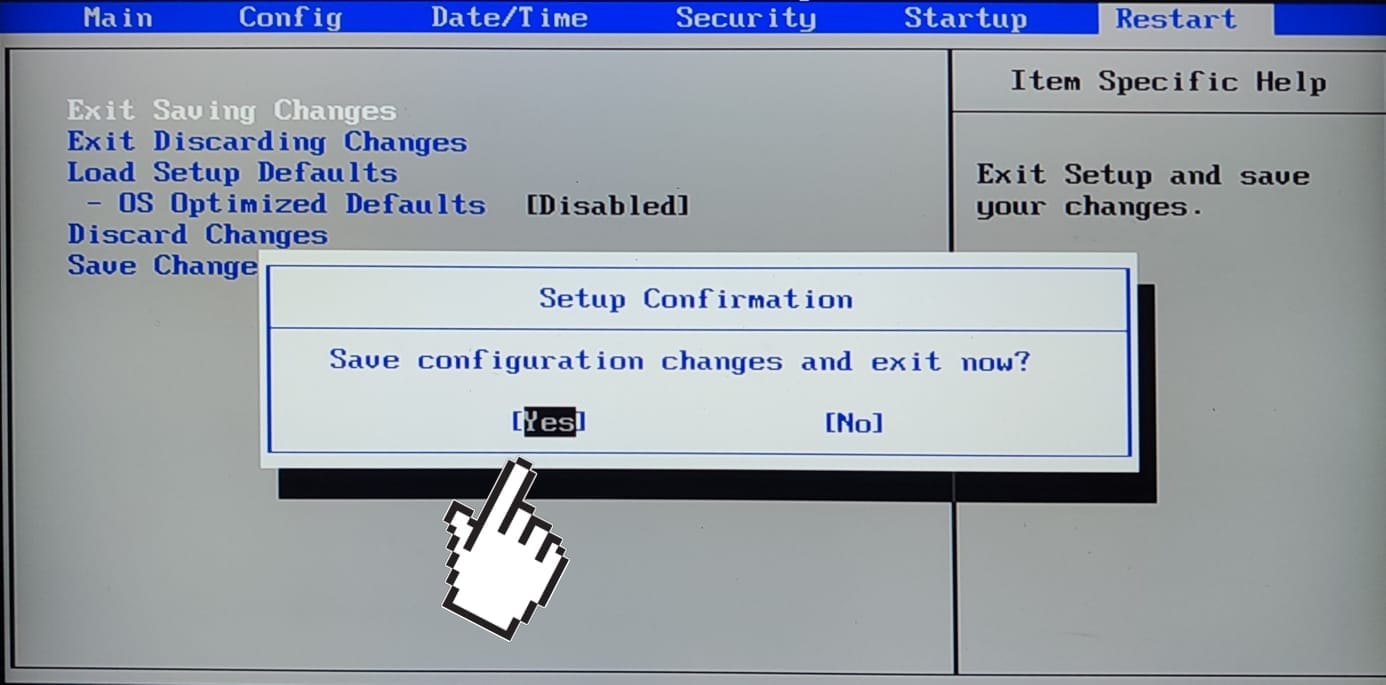
- Save changes and exit BIOS (Save & Exit, usually by pressing the
F10key).
Step 2: Booting into the Memora Installer Flash Drive
- Connect the bootable flash drive to the computer's USB port.
- Turn on the computer, then immediately press the Boot Menu key repeatedly until the boot device list appears.
- On the boot menu selection, choose your flash drive name with UEFI mode (Example:
UEFI: SanDisk).
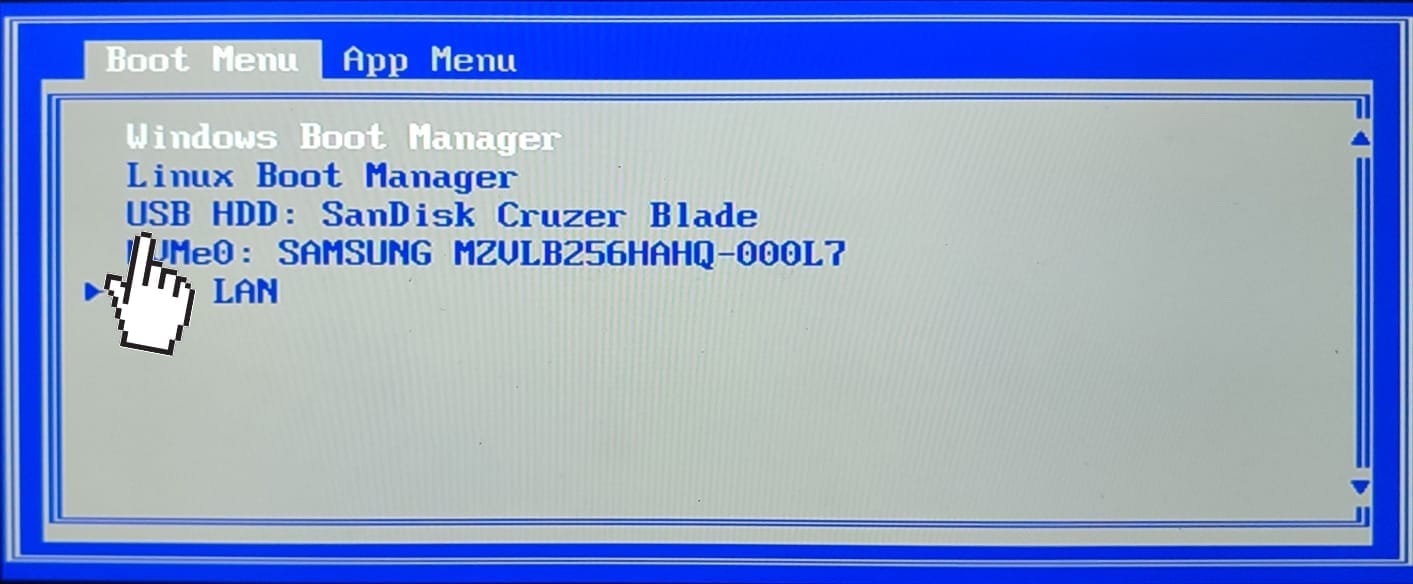
4. Press Enter to confirm.
Step 3: Selecting the Memora Boot Option
After successfully booting from the flash drive, you will be presented with the initial Memora launch screen:
- Select the top option:
Memora linux install medium - Press
Enter. - Wait for the text loading process (booting log) to finish until you arrive at the main terminal screen with a red/white prompt:
root@archiso ~ #
5. Connecting to the Internet
We need the internet to download system files, you can use Ethernet and Wi-Fi. Ethernet, WLAN and WWAN interfaces using DHCP should work automatically. For Wi-Fi, we will use a simple tool called iwctl to connect to your WiFi.
First, open the network tool by typing this command in your terminal and pressing Enter:
5.1 Finding Your WiFi Device Name
Every computer's WiFi card has a name (like an ID card). Let's see yours by typing:
You will see a list that looks like this:
Device      Name
-----------------
wlan0       wlan0
In this example, our WiFi device name is wlan0.
Friendly Note: Your computer might name it something slightly different (like wlan1 or wifi0). Always use whatever name pops up on your own screen!
5.2 Finding Available WiFi Networks
Now, let's scan for nearby WiFi signals using your device name (replace device with your actual name, e.g., wlan0):
5.3 Connecting to Your WiFi
To connect to your home or office WiFi, use this command (change device to your WiFi name, and ssid to your exact WiFi name):
Example: If your device is wlan0 and your WiFi name is Home, type:
Type your WiFi password when it prompts you. Once you are successfully connected, type exit to leave the network menu.
6. Storage Partitions (Splitting Your Hard Drive)
Before performing the installation, your storage needs to be divided into several specific parts. Think of your hard drive like a large empty house. Before moving in, we need to divide it into different rooms for different purposes:
| Partition | Function | Recommended Size |
|---|---|---|
| EFI | Stores bootloader files so the computer can start up. | 1GB |
| Root (/) | Stores the operating system and applications. | 15GB - 30GB |
| Home (/home) | Stores user data such as documents, pictures, and personal files. | Remaining space |
| Swap | Used as additional memory when the main RAM is full. | 2GB - 8GB |
Here is an example of partitioning a 50GB Disk:
Disk 50GB
├── EFI        1 GB
├── Root       15GB
├── Home       30GB
└── Swap        4GB
6.1 Viewing Available Disks
First, use this command to check what your hard drive is named on your computer:
Example output:
NAME        SIZE
sda         50G
In this example, the disk being used is /dev/sda.
Make sure to select the correct disk. Choosing the wrong disk can cause all your data to be erased.
6.2 Creating Partitions Using cfdisk
Run the following command (replace sda with your actual disk name):
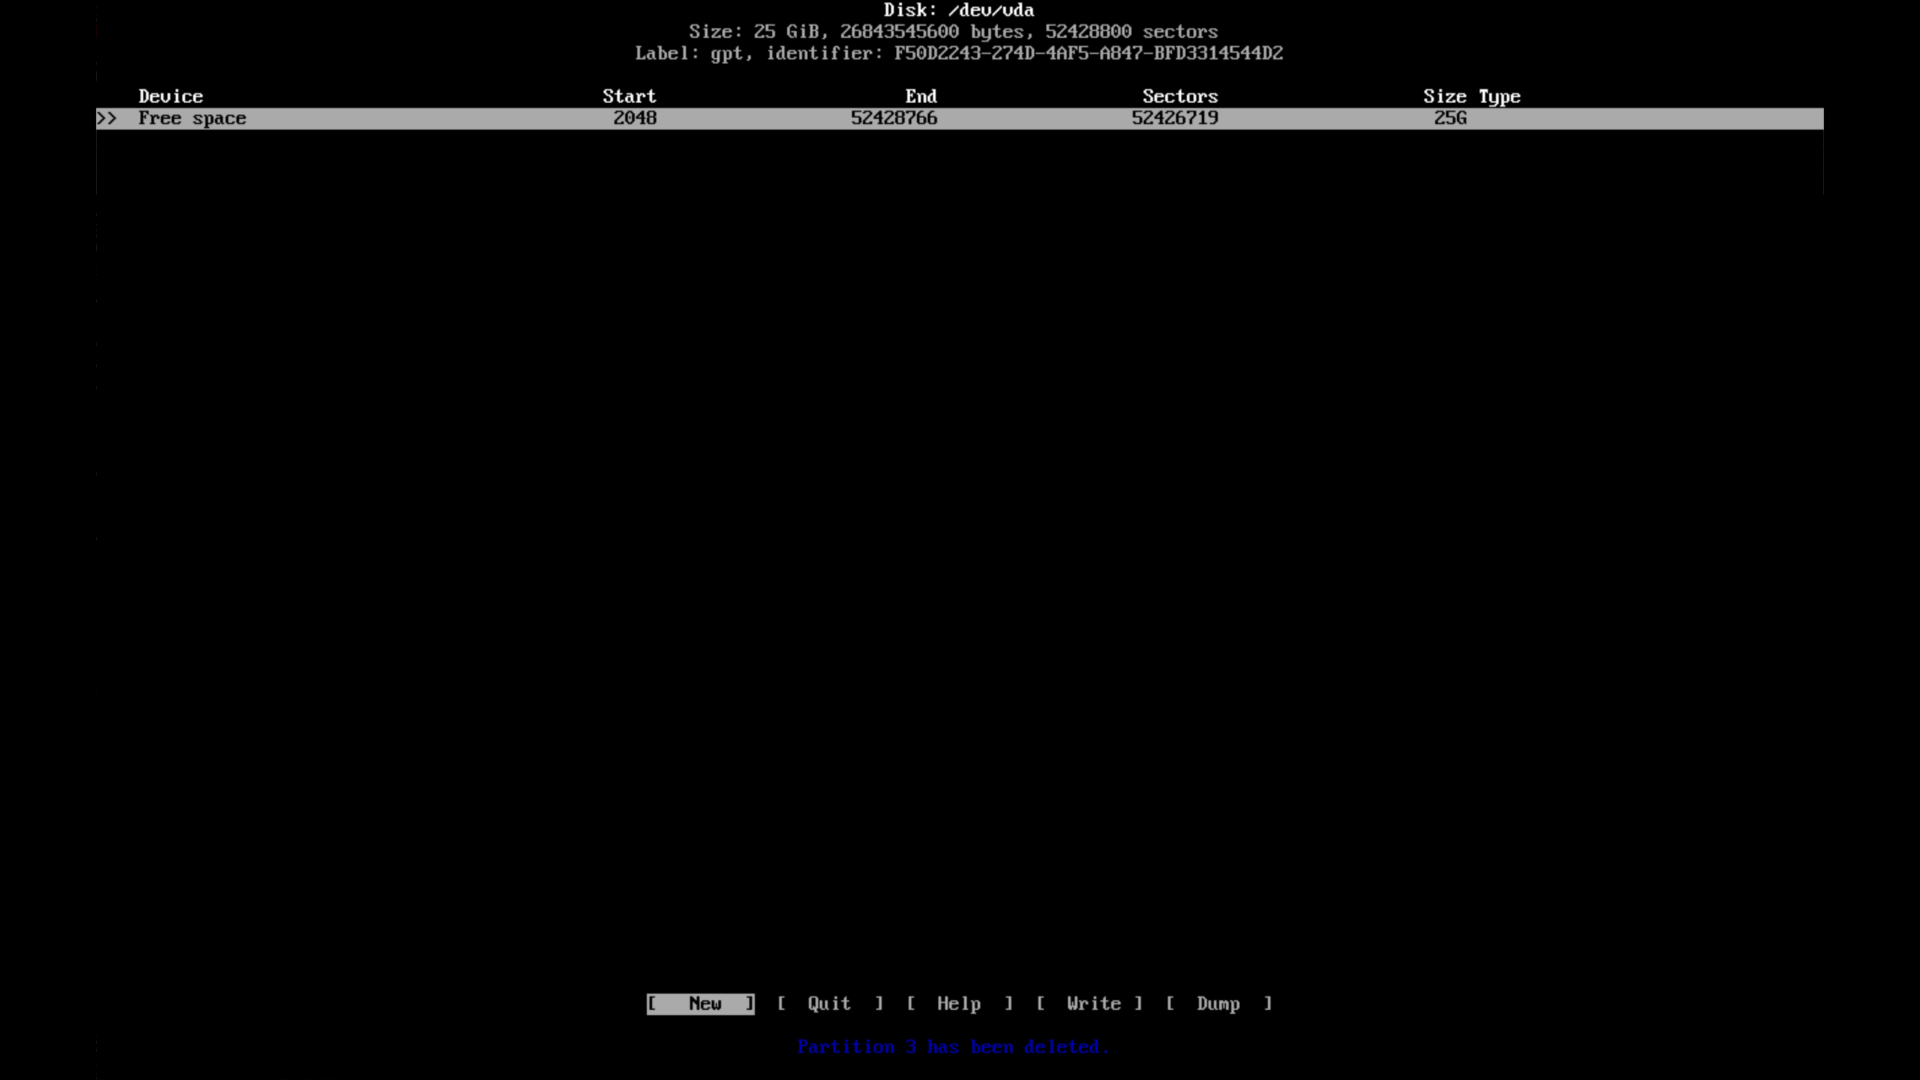
6.2.1 EFI Partition
1. Press Enter on the "New" option.
2. Type 1G as shown in the image below.
3. Press Enter and select the "type" option.
4. Select EFI System.
- Size:
1GB - Type:
EFI System
Function: Stores bootloader files so the computer can run the operating system.
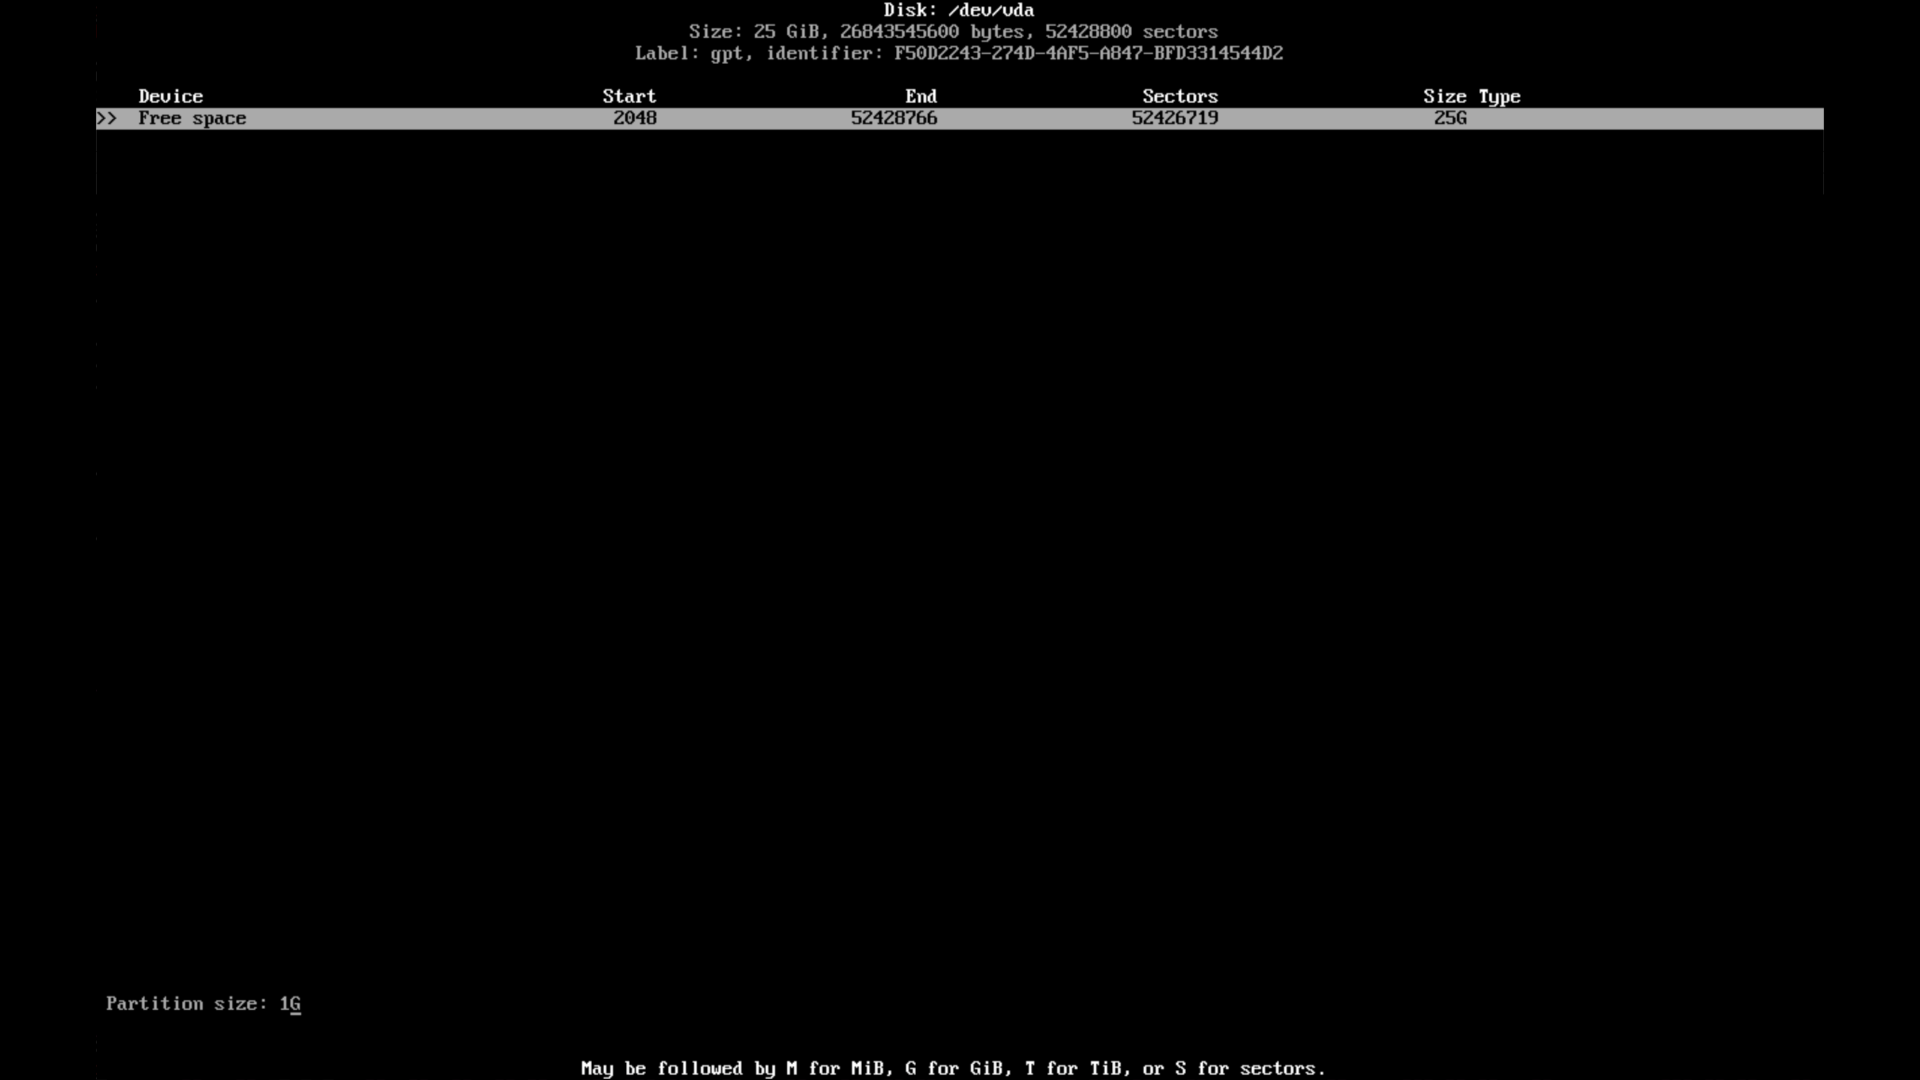
6.2.2 Root Partition (/)
1. Press Enter on the "New" option.
2. Type 15G as shown in the image below.
3. Press Enter and select the "type" option.
4. Select Linux filesystem.
- Size:
15GB - Type:
Linux filesystem
Function: Stores the operating system files, configuration, and applications.
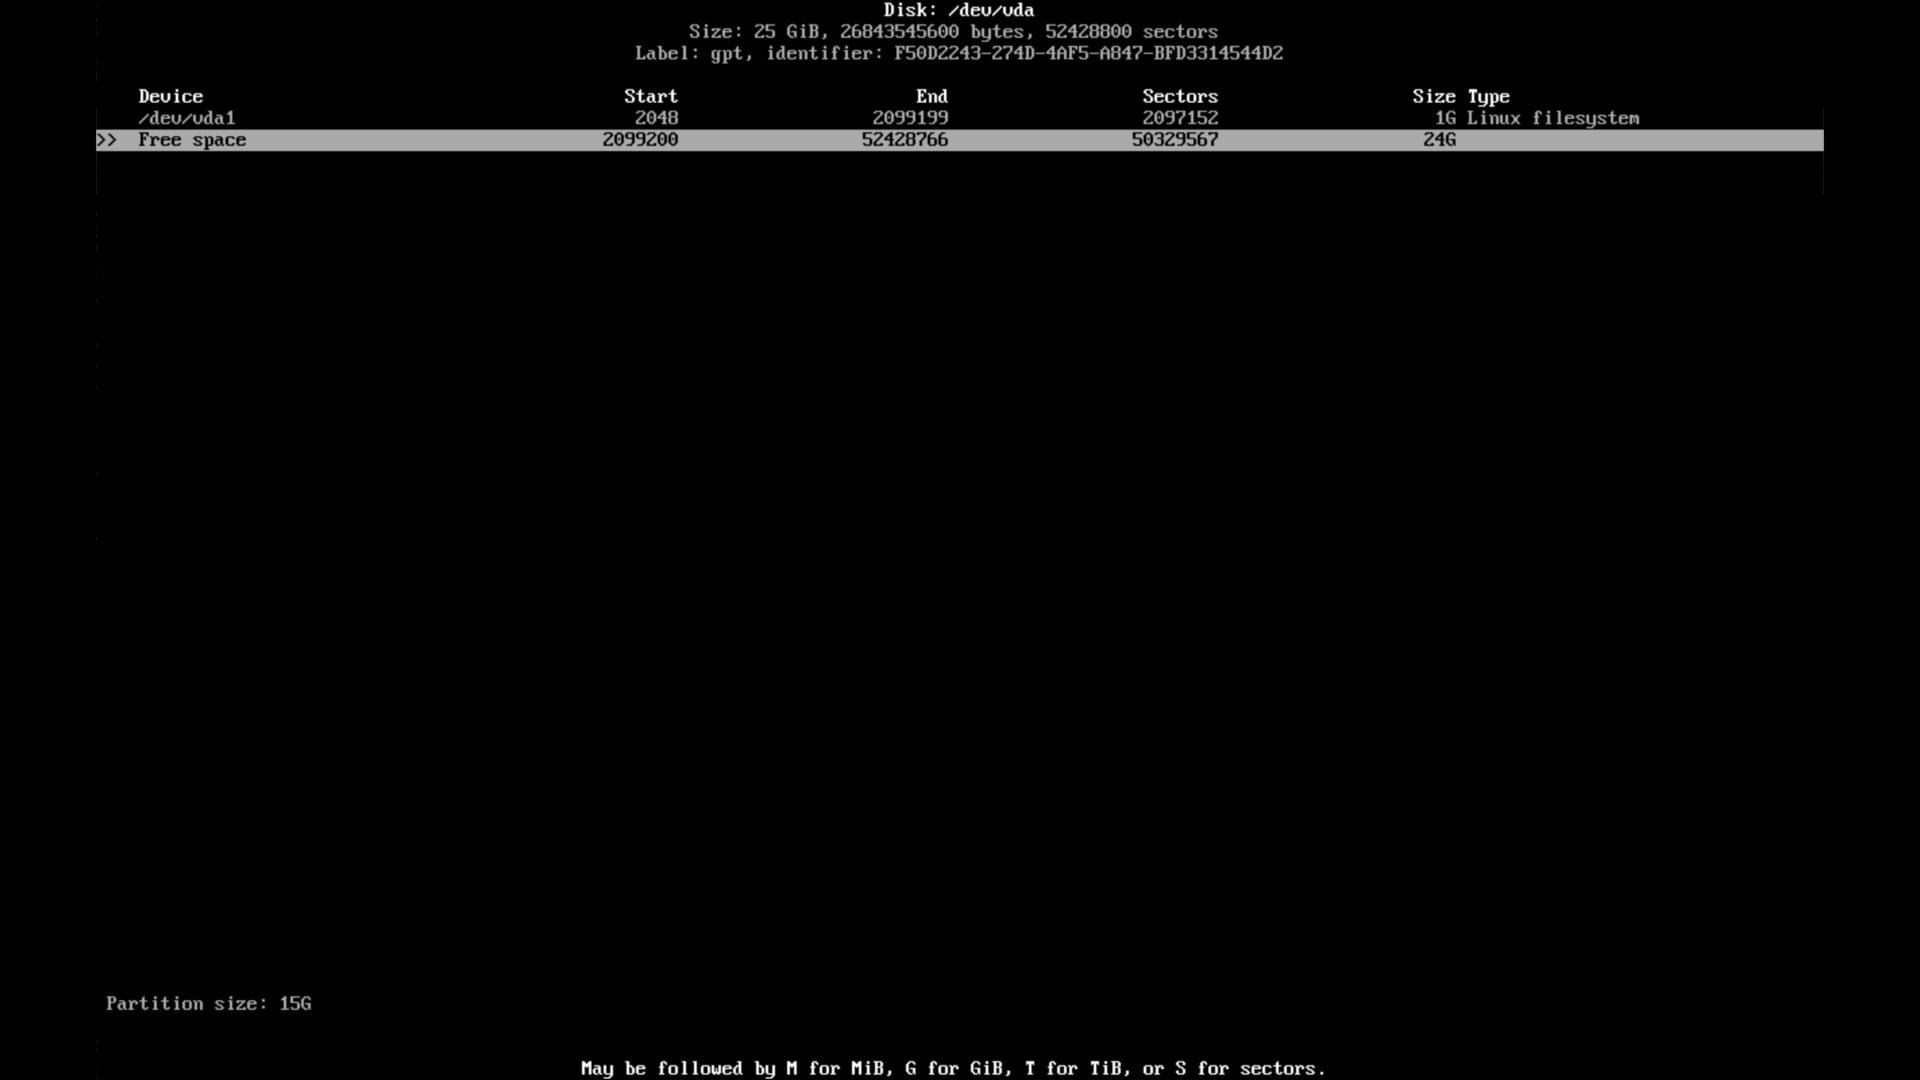
6.2.3 Swap Partition
1. Press Enter on the "New" option.
2. Type 4G as shown in the image below.
3. Press Enter and select the "type" option.
4. Select Linux swap.
- Size:
2GB - 8GB - Type:
Linux swap
Function: Used as additional virtual memory when the main RAM is full.
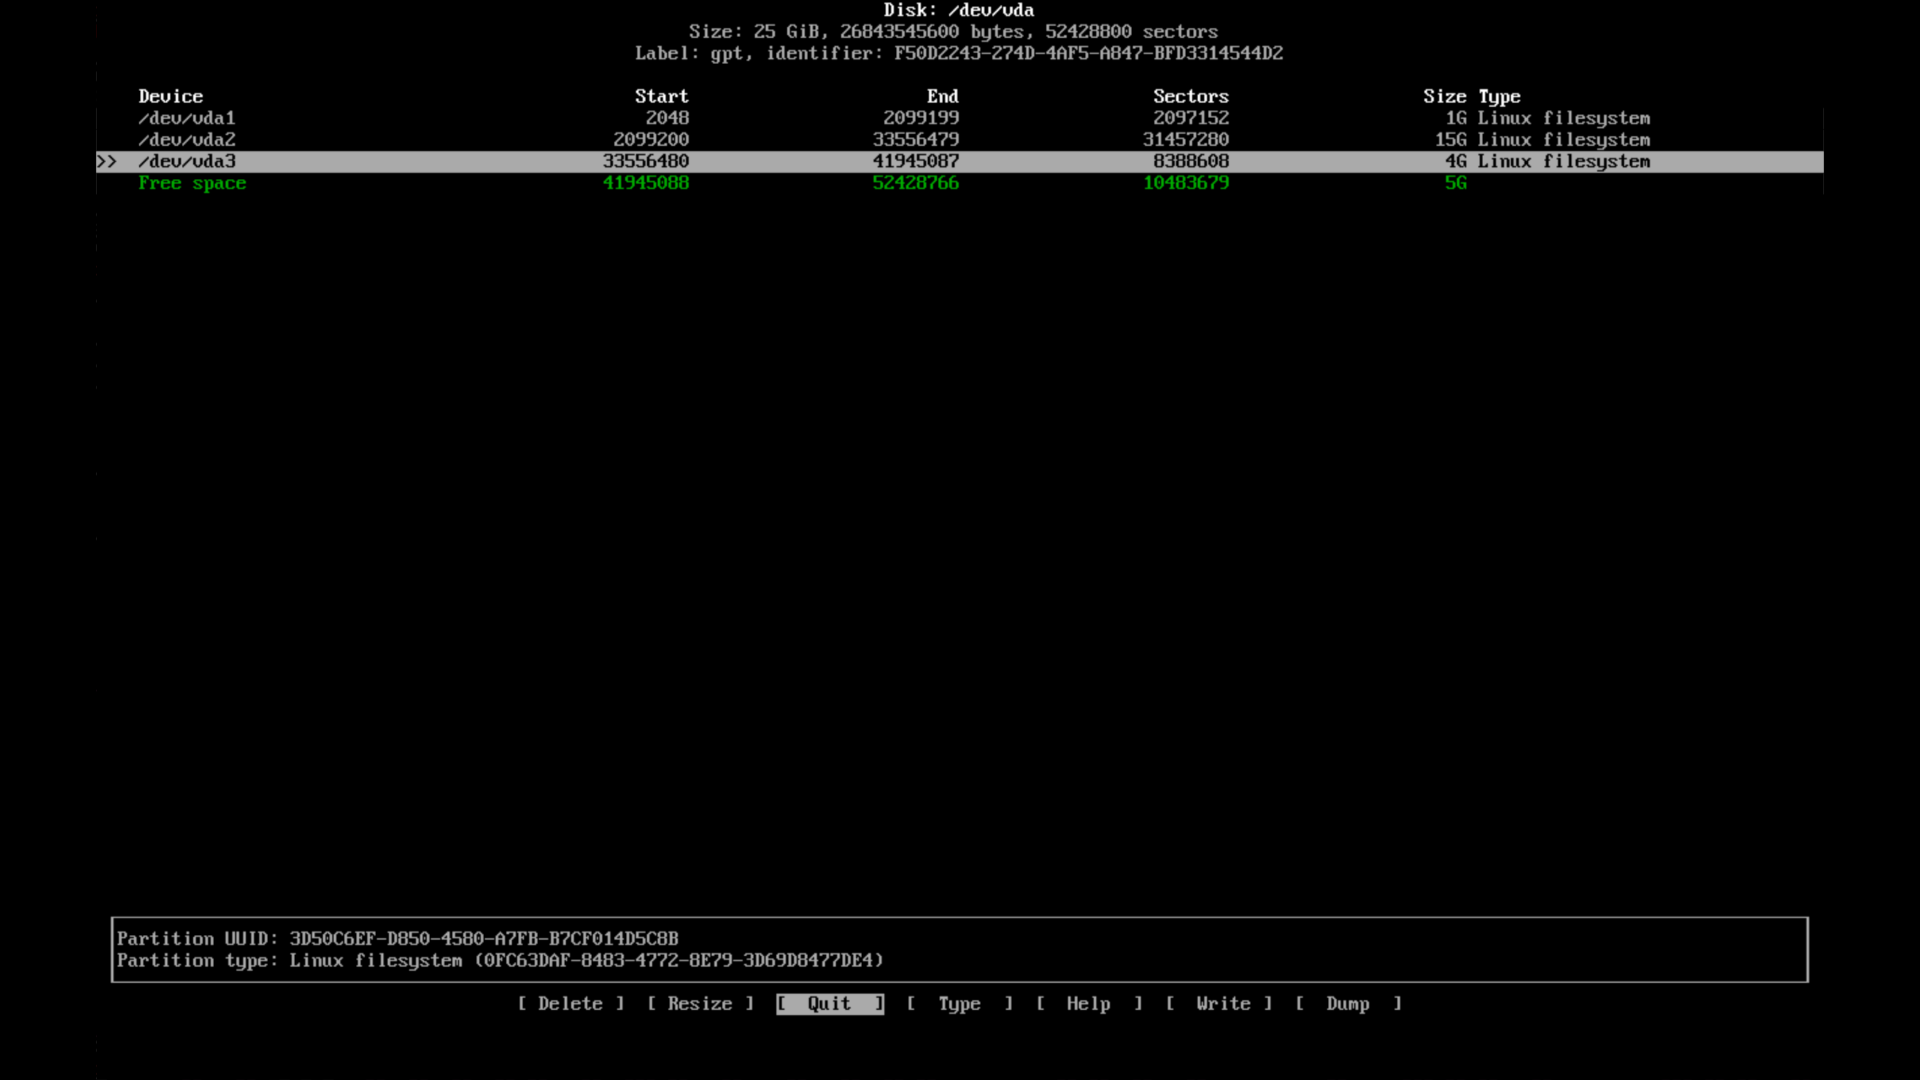
6.2.4 Home Partition (/home)
1. Press Enter on the "New" option.
2. Adjust to the remaining partition.
3. Press Enter and select the "type" option.
4. Select Linux filesystem.
- Size:
Remaining storage space - Type:
Linux filesystem
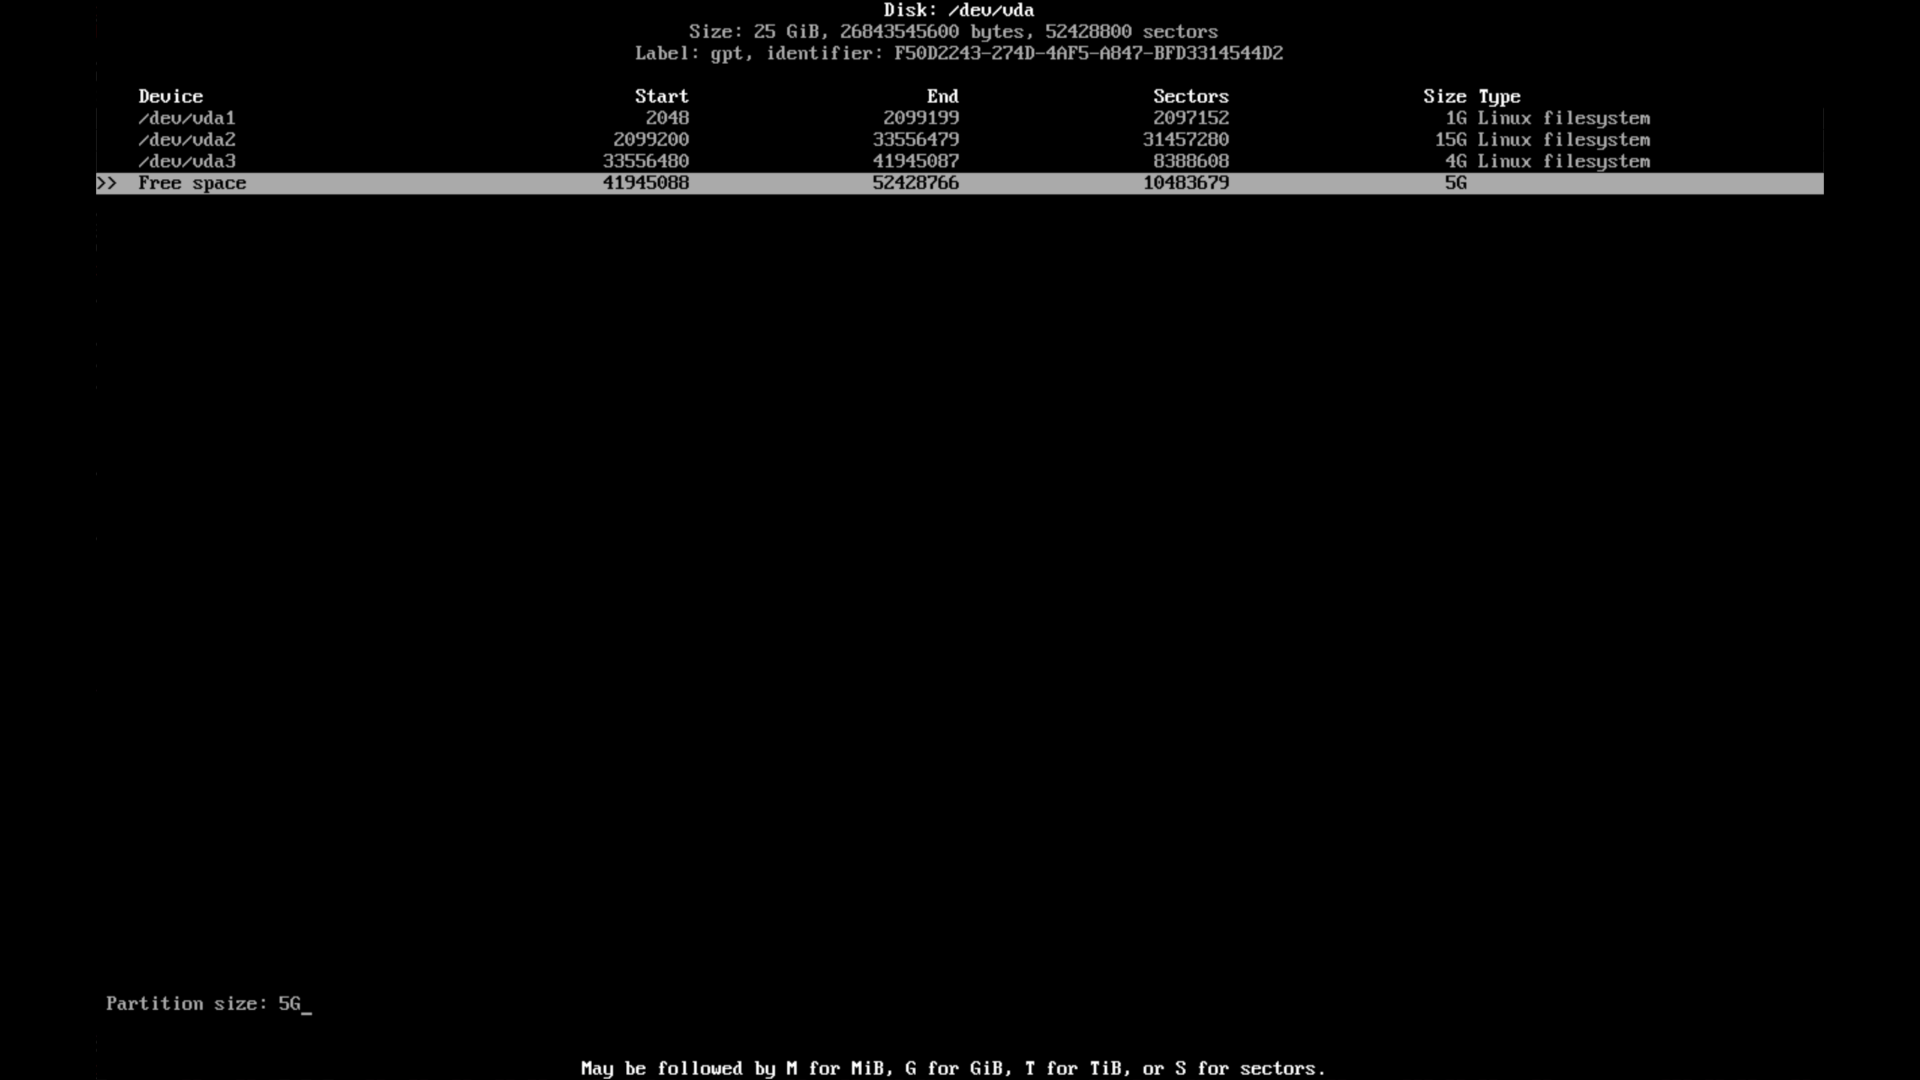
Function: Stores user data such as documents, pictures, and personal files.
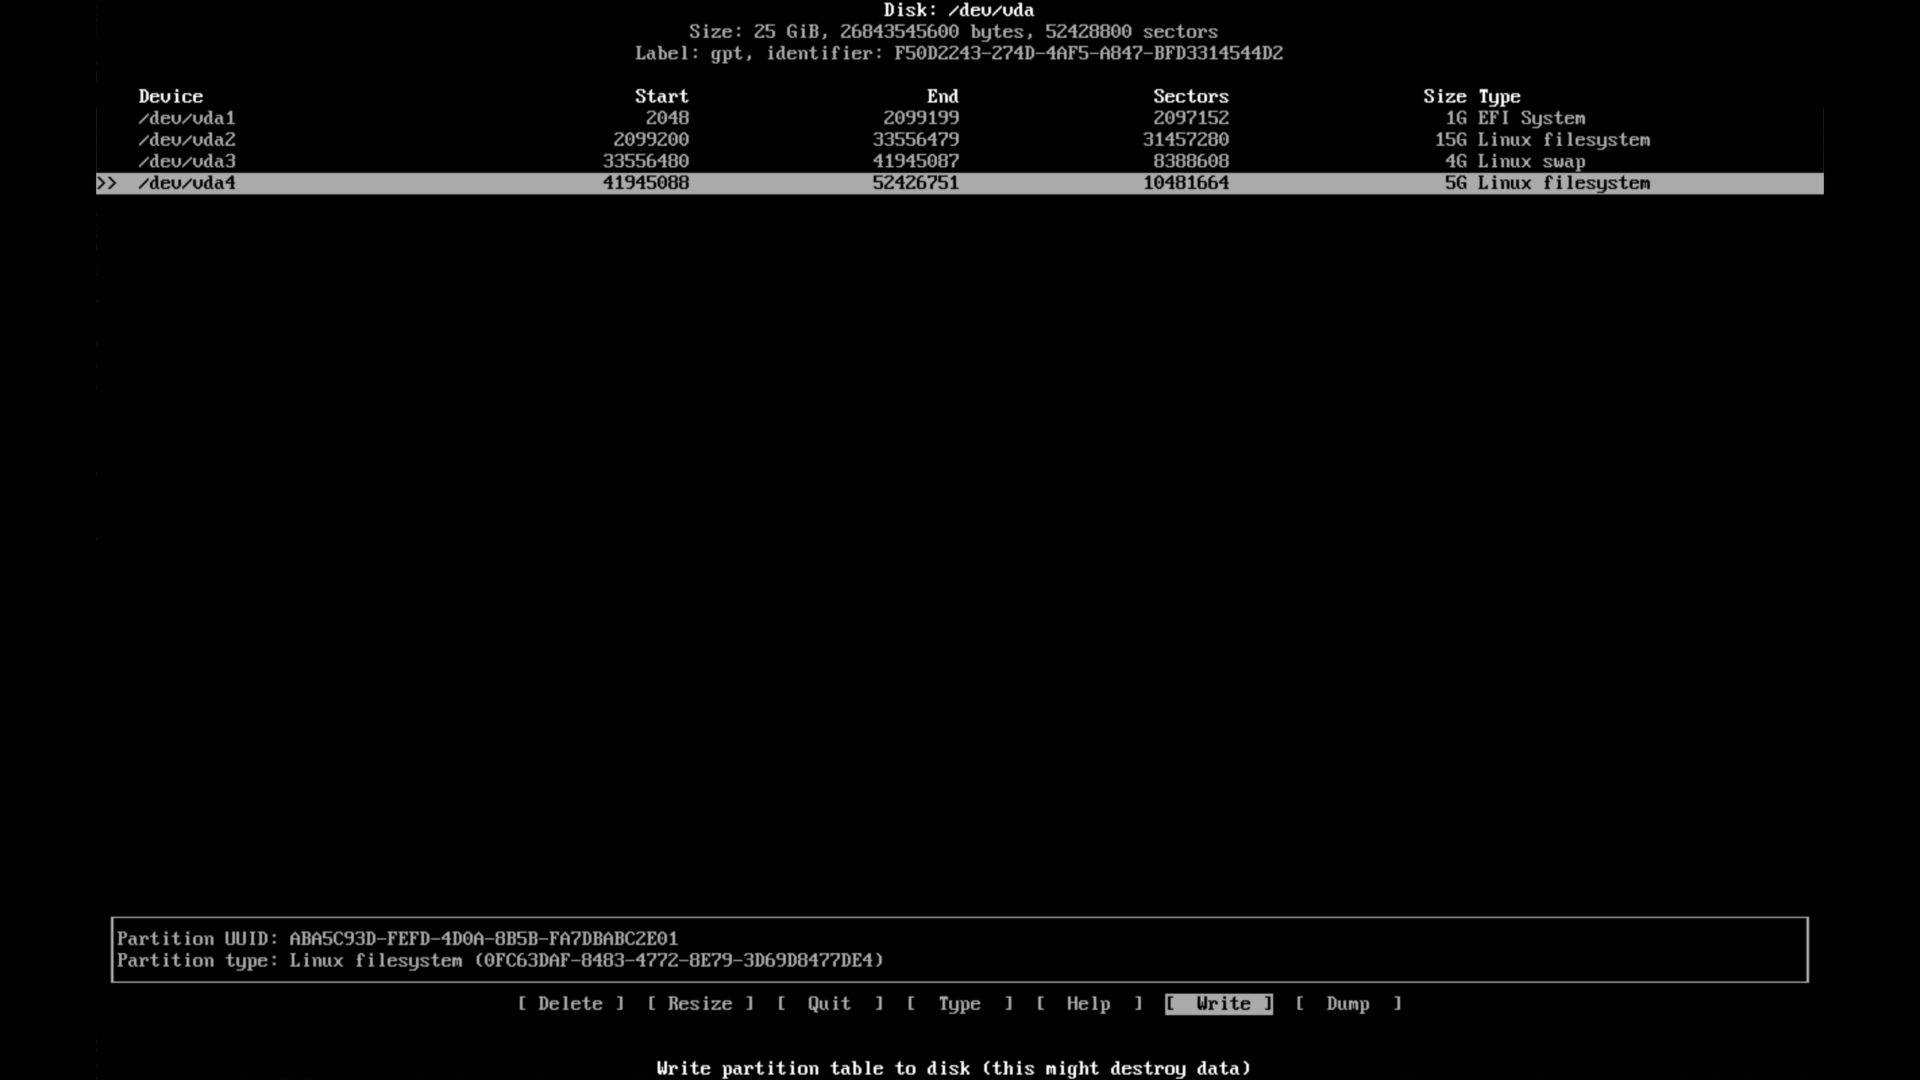
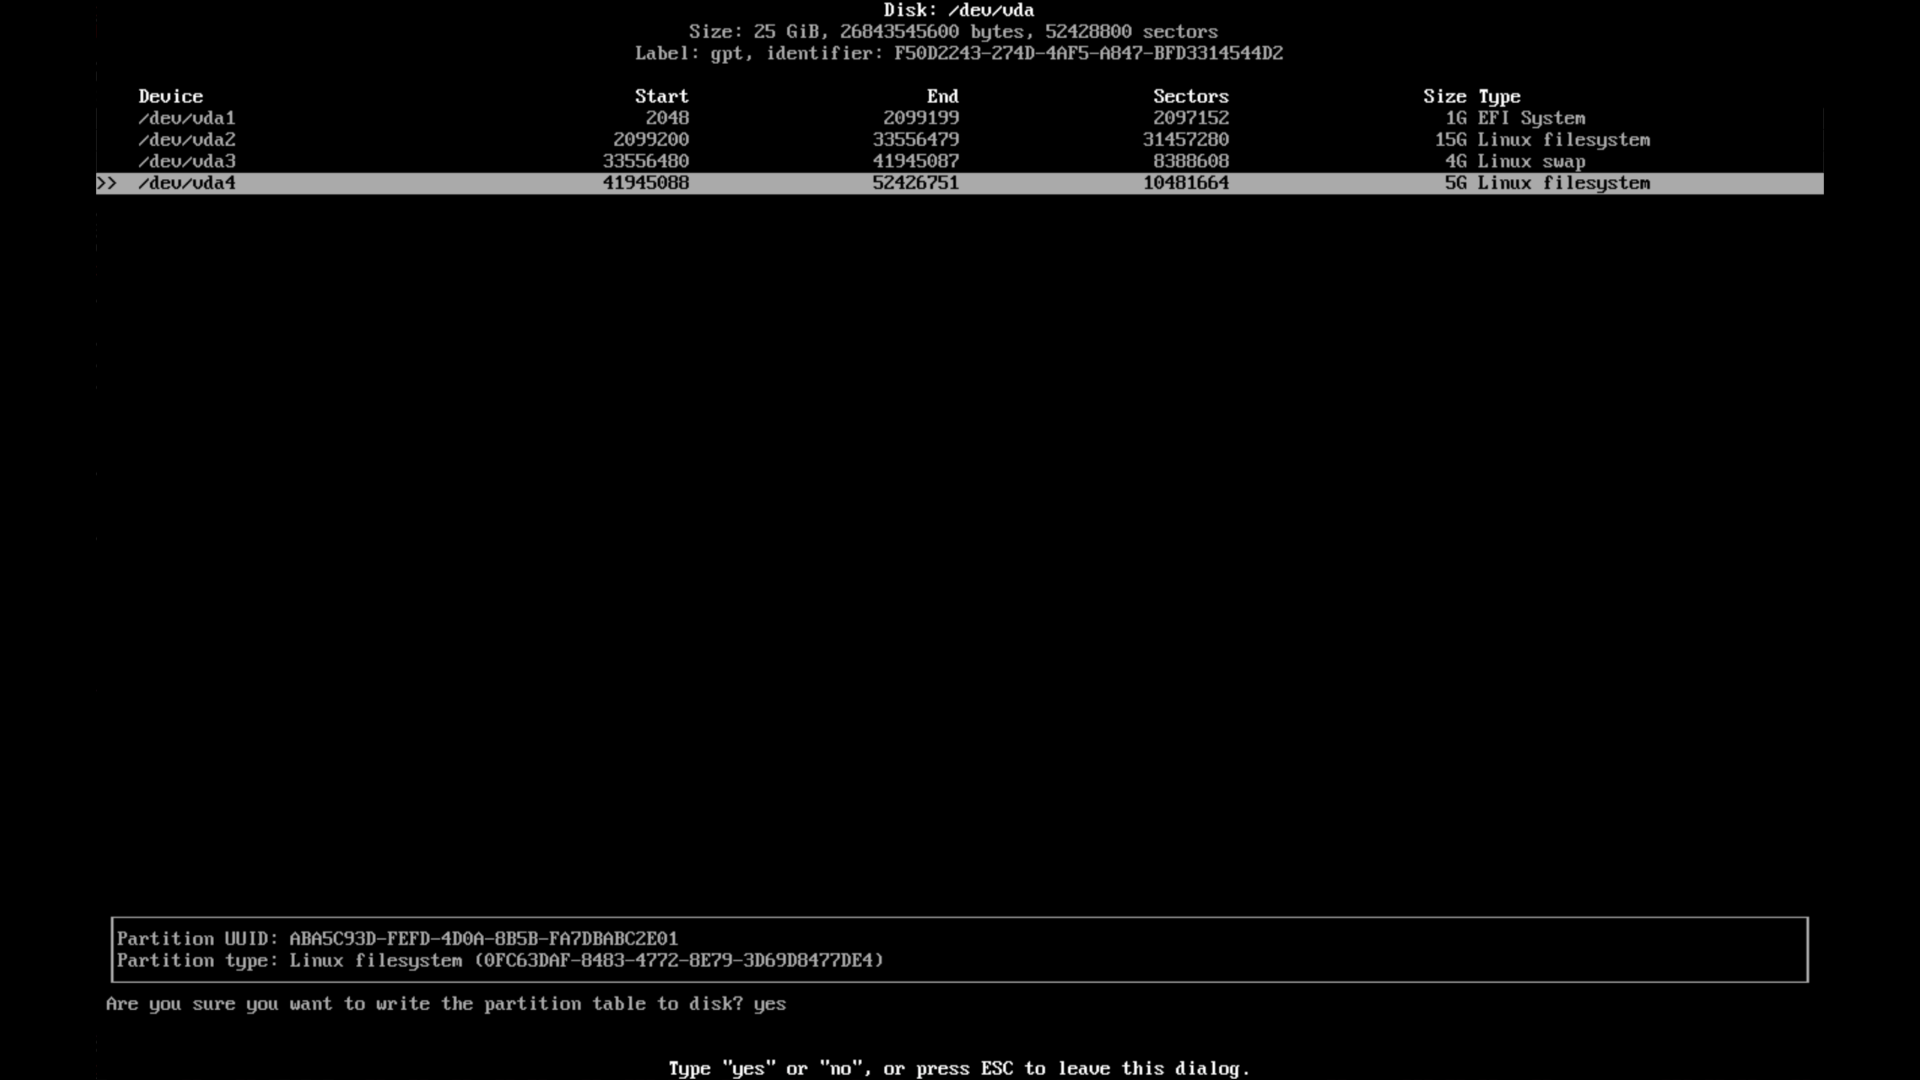
Once you have created all the partitions, save your changes by selecting:
Then, exit the cfdisk tool by selecting:
7. Step-by-Step Interactive Installation
Now we are ready to grab the installer tools and launch the installation wizard!
Once that's done, start the friendly automated installer by typing:
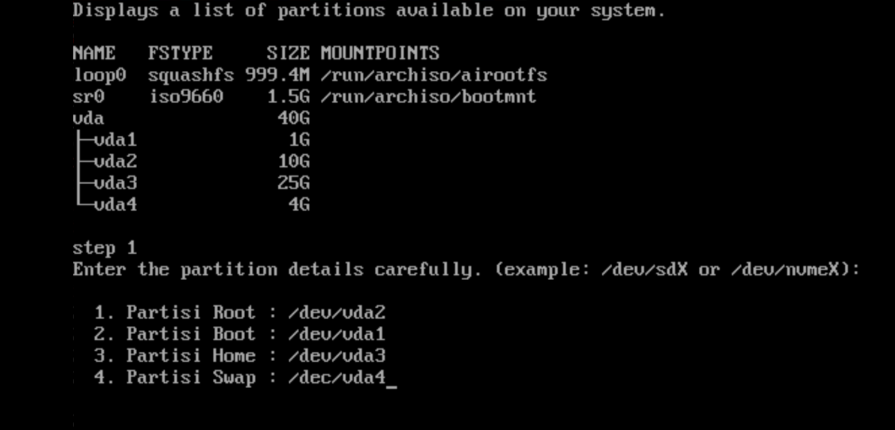
Follow these visual steps carefully on your screen:
Step 1: Choose the partition you want to use
ALL DATA INSIDE THE CHOSEN PARTITION WILL BE PERMANENTLY ERASED!
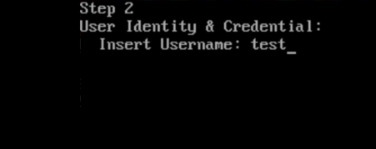
Step 2: Enter your username
Type a short, cool username for yourself (all lowercase letters, no spaces, like dimas or foxy).
Step 3: Enter your password
Create a secure password to protect your account.
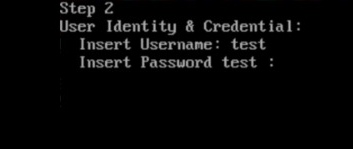
Don't panic if no letters or dots show up while typing your password—that is a normal security feature in Linux! Just type it blindly and press Enter.
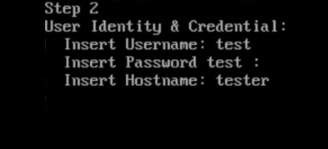
Step 4: Enter your computer name (hostname)
Give your computer a nickname (e.g., memora-pc).
Step 5: Choose your country

Step 6: Set your Continent

Step 7: Set your time zone (City)
.jpg)
Tip: You can scroll up and down through the city list using your keyboard arrow keys. Once you find your city's number, just press the letter q on your keyboard to lock it in!
Step 8: Final Confirmation
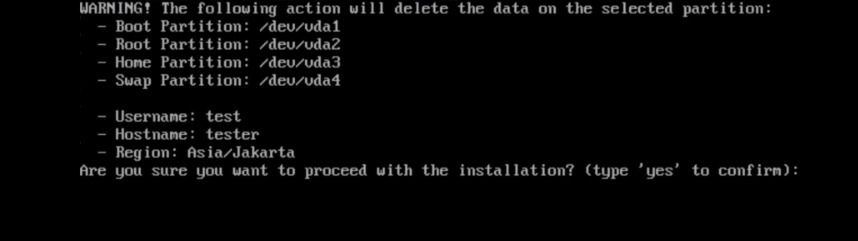
Type the word yes if you are 100% sure everything looks correct. If you made a mistake, don't worry—just press Ctrl + C on your keyboard to cancel and start over from Step 1!
Step 9: Let the magic happen (Installation in progress)
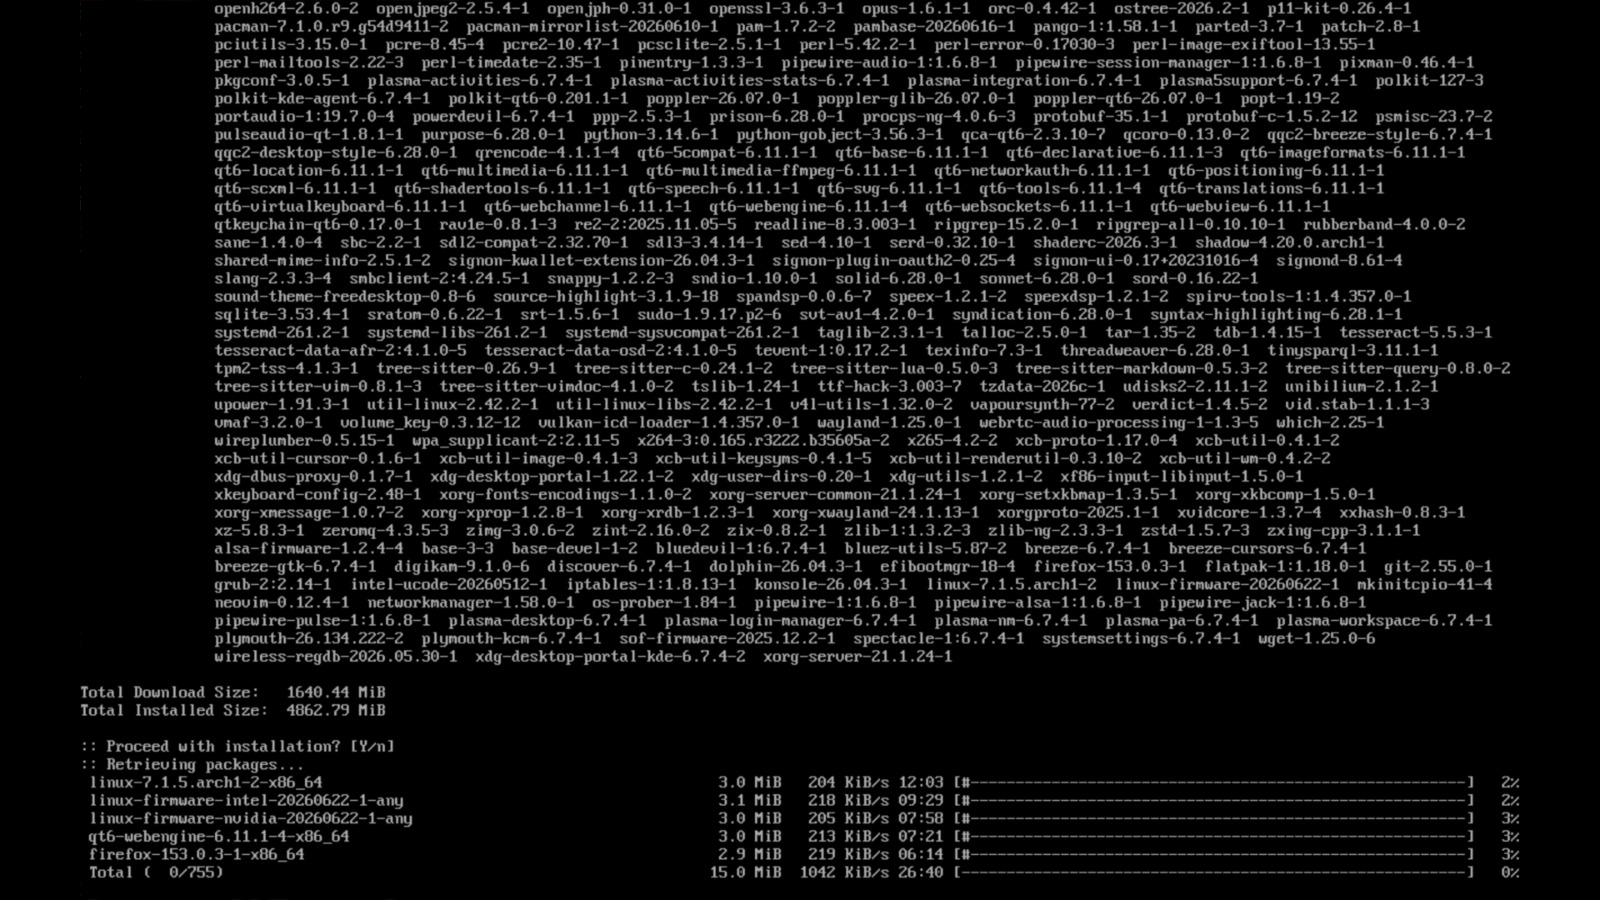
Sit back, relax, and let the computer do all the hard work until it says complete.
8. After Installation is Complete
Congratulations, friend! You have successfully installed Memora OS. Now let's boot into your brand new system:
- Restart your computer by typing:
reboot - Unplug your USB flash drive installer so the computer doesn't boot into it again.
- Let your computer start up normally from its internal hard drive.
- Log in using the username and password you just created in Step 2 and 3. Welcome home!